If you’re considering upgrading your garage, epoxy flooring might be on your radar. It’s a popular choice for many homeowners and businesses alike due to its toughness and sleek look. But before you dive in, you probably have a bunch of questions. What’s it all about? How do you install it? And what maintenance is involved? This FAQ guide covers everything you need to know about garage epoxy flooring, so you’re well-prepared for your project.
Key Takeaways
- Epoxy flooring is a durable coating applied over concrete, enhancing its lifespan.
- Proper surface prep is key to a successful epoxy installation.
- Regular cleaning and occasional topcoat reapplication keep your floors looking great.
- Epoxy is resistant to stains and moisture, making it ideal for garages.
- Different epoxy types and designs allow customization to suit your style.
Understanding Garage Epoxy Flooring
What Is Epoxy Flooring?
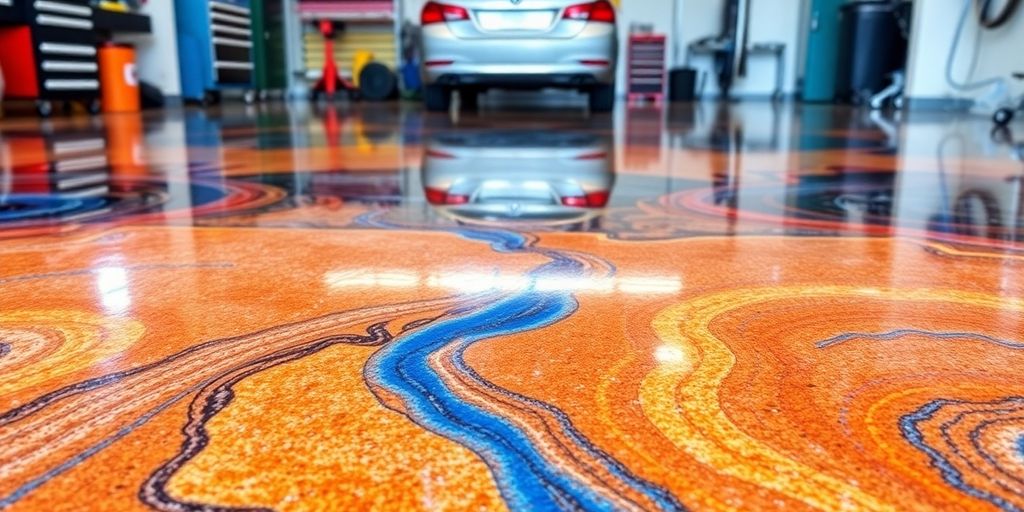
Okay, so what is epoxy flooring anyway? Basically, it’s a coating you put over your existing concrete garage floor. Concrete is already pretty tough, but epoxy kicks it up a notch, making it even stronger and more durable. This is super important if you’re constantly dragging heavy stuff around or just want a floor that can handle a beating. Plus, it looks way better than plain concrete. You can get it in all sorts of colors and designs to make your garage actually look nice.
How Does Epoxy Work?
Epoxy isn’t just paint; it’s a thermosetting polymer. What does that mean? Well, it comes in two parts: a resin and a hardener. When you mix them, a chemical reaction happens, and the liquid epoxy turns into a solid, plastic-like material. This creates a strong bond with the concrete, making it resistant to all sorts of things. Here’s a quick breakdown:
- Resin and hardener are mixed.
- Chemical reaction occurs.
- Epoxy hardens into a durable coating.
- Bonds tightly to the concrete surface.
Benefits of Epoxy Flooring
Why should you even bother with epoxy? Here’s the deal:
- Durability: Epoxy floors can last for years, even with heavy use. They resist impacts, stains, and chemicals.
- Appearance: You can choose from a ton of colors and styles to create a custom look. Some people even add decorative color flakes for extra flair.
- Easy to Clean: Epoxy is seamless and non-porous, so dirt and spills wipe right up. No more scrubbing stained concrete!
- Protection: Epoxy protects the concrete underneath from damage, extending the life of your garage floor.
Honestly, one of the best things about epoxy is how much brighter it makes the garage. A light-colored epoxy floor reflects light, making the whole space feel bigger and more inviting. Plus, it’s a great selling point if you ever decide to move.
Installation Process for Epoxy Flooring
So, you’re thinking about installing epoxy flooring? Awesome! It’s a great way to get a durable and good-looking floor. But before you jump in, it’s good to know what’s involved. It’s not rocket science, but it does take some prep and attention to detail. Let’s break down the process.
Preparing the Concrete Surface
This is probably the most important step. If you don’t prep the concrete right, the epoxy won’t stick, and you’ll end up with a mess. Think of it like painting – you wouldn’t paint over a dirty wall, right? Same idea here. First, you need to clean the floor really well. Get rid of any dirt, oil, or anything else that’s hanging out on the surface. A good scrub with a degreaser usually does the trick. Next, you’ll want to repair any cracks or holes. Use a concrete patch to fill them in and let it dry completely. Finally, you might need to grind the surface to make it a little rough. This gives the epoxy something to grab onto. You can rent a concrete grinder from most tool rental places. And don’t forget to vacuum up all the dust before you move on!
Mixing and Applying Epoxy
Okay, now for the fun part! But seriously, pay attention here. Epoxy comes in two parts: the resin and the hardener. You need to mix them together exactly according to the instructions. Too much of one or the other, and the epoxy won’t cure properly. Use a drill with a mixing attachment to get it nice and smooth. Once it’s mixed, you have a limited amount of time to apply it before it starts to harden. Pour the epoxy onto the floor and use a squeegee or roller to spread it out evenly. Work in sections to make sure you don’t miss any spots. You might want to apply a second coat for extra durability. Just let the first coat dry completely before you start the second. Consider the types of epoxy products available to ensure you choose the right one for your needs.
Curing Time and Conditions
This is where you need to be patient. Once you’ve applied the epoxy, you need to let it cure. This means letting it sit undisturbed while it hardens. The curing time depends on the type of epoxy and the temperature. Usually, it takes at least 24 hours before you can walk on it, but it can take up to a week for it to fully cure. Make sure the area is well-ventilated during this time. Also, try to keep the temperature consistent. Extreme heat or cold can mess with the curing process. Once it’s fully cured, you’re good to go! You’ll have a beautiful, durable epoxy floor that will last for years. Remember that proper concrete surface preparation is key to a long-lasting finish.
I messed up the curing process once by opening the garage door too early. Dust and leaves blew in and got stuck in the wet epoxy. It was a pain to clean up, and the finish wasn’t as smooth as it should have been. Learn from my mistakes and be patient!
Maintenance Tips for Epoxy Floors
Cleaning and Care Guidelines
Maintaining your epoxy garage floor doesn’t have to be a chore. Regular cleaning is key to keeping it looking its best. I usually sweep my garage floor weekly to get rid of any loose dirt, leaves, or debris that gets tracked in. For deeper cleaning, I use a soft-bristle broom and a mild cleaning solution – dish soap works great! Just make sure to rinse thoroughly with clean water to avoid any soap residue. Avoid using harsh chemicals or abrasive cleaners, as they can dull or even damage the epoxy finish. I learned that the hard way when I tried using a heavy-duty cleaner and ended up with a cloudy spot. Now I stick to the gentle stuff. Promptly address stains with a mild cleaning solution and a soft sponge.
- Sweep regularly to remove loose debris.
- Mop with a mild soap and water solution.
- Avoid harsh chemicals and abrasive cleaners.
I’ve found that placing mats at the entrance to my garage helps reduce the amount of dirt and grime that gets tracked onto the epoxy floor. It’s a simple step, but it makes a big difference in keeping the floor clean and minimizing wear and tear.
Repairing Minor Damage
Even with the best care, minor scratches or chips can happen. The good news is that repairing them is usually pretty straightforward. For small scratches, you can often use a color-matched epoxy touch-up kit. Just clean the area, apply the touch-up epoxy, and let it cure according to the manufacturer’s instructions. For larger chips or cracks, you might need to use a more substantial epoxy repair kit. These kits typically include a filler material that you mix with epoxy resin to create a paste. Apply the paste to the damaged area, smooth it out, and let it cure. Sand it down to blend with the surrounding floor, and then apply a topcoat of epoxy to seal the repair. It’s a bit more involved, but it can save you from having to replace the entire floor. If you are not comfortable doing it yourself, consider hiring a professional to handle the epoxy garage coating.
- Use color-matched epoxy touch-up kits for small scratches.
- Employ epoxy repair kits with filler for larger chips or cracks.
- Sand and apply a topcoat to blend repairs seamlessly.
Reapplication of Topcoat
To keep your epoxy floor looking its best for years to come, consider reapplying a topcoat every few years. The topcoat acts as a protective layer, shielding the epoxy from scratches, stains, and UV damage. The frequency of reapplication depends on the amount of traffic and wear your floor experiences. For a residential garage, every 5-7 years is usually sufficient. Before reapplying the topcoat, clean the floor thoroughly and lightly sand it to create a good bonding surface. Then, apply a thin, even layer of the topcoat using a roller or brush. Let it cure completely before using the garage again. This simple step can significantly extend the life of your epoxy floor and keep it looking like new. Regular maintenance ensures the floors remain in excellent condition. Here’s a quick guide:
| Frequency | Task | Purpose |
|---|---|---|
| Weekly | Sweeping | Remove loose debris |
| Monthly | Mopping | Clean dirt and grime |
| 5-7 Years | Topcoat Reapplication | Protect and extend the floor’s lifespan |
Common Questions About Epoxy Flooring
How Long Does Epoxy Last?
Okay, so you’re wondering how long epoxy flooring actually lasts, right? Well, it’s a pretty common question. Generally, a properly installed and maintained epoxy floor can last anywhere from 5 to 10 years, or even longer. It really depends on a few things. For example, if you’ve got a busy commercial space with forklifts driving around all day, it’s probably not going to last as long as the epoxy in your home garage. The type of epoxy used also matters, as does how well you take care of it. Harsh chemicals and heavy impacts can shorten its lifespan, so be mindful of that.
Is Epoxy Flooring Slip Resistant?
Slip resistance is a big deal, especially in places like garages where spills are common. The short answer is: it can be! Standard epoxy can be a bit slippery, especially when wet. However, there are ways to make it more slip-resistant. You can add aggregates like sand or aluminum oxide during the application process. These create a textured surface that provides better traction. Also, some epoxy products are specifically designed with anti-slip properties. So, if slip resistance is a concern, make sure to ask about these options when you’re choosing your epoxy.
What Are the Cost Factors?
Alright, let’s talk money. Figuring out the cost of epoxy flooring can be tricky because it depends on a bunch of different things. Here’s a quick rundown:
- Size of the area: Obviously, a bigger garage means more materials and more labor, which translates to a higher cost.
- Type of epoxy: There are different grades of epoxy, and the higher the quality, the more expensive it will be. Some epoxies have special properties, like chemical resistance or UV protection, which also add to the cost.
- Surface preparation: If your concrete floor is in bad shape, it’ll need more extensive prep work, like grinding or patching, which will increase the overall cost.
- Labor costs: Installation costs can vary depending on where you live and the experience of the installer. Get a few quotes to compare.
- Additional features: Things like decorative flakes, metallic pigments, or anti-slip additives will also add to the price.
It’s important to remember that while epoxy flooring might seem expensive upfront, it can actually save you money in the long run. It’s super durable and easy to clean, so you won’t have to replace it as often as other flooring options. Plus, it can increase the value of your home.
Choosing the Right Epoxy for Your Garage
Types of Epoxy Products
Okay, so you’re ready to coat your garage floor. Awesome! But hold up – not all epoxies are created equal. You’ve got a few main types to pick from, and each has its own strengths. First, there’s solid epoxy, which is basically pure epoxy with no solvents. It’s super durable and sticks really well, but it can be trickier to work with because it’s thick. Then you have water-based epoxies, which are easier to apply and have less odor, but they might not be as tough as the solid stuff. Finally, there are solvent-based epoxies, known for their durability and chemical resistance, but they release strong fumes, so ventilation is key. Choosing the right one depends on your budget, how much you use your garage, and how comfortable you are with DIY projects.
Color and Design Options
Let’s talk looks! Epoxy isn’t just about protection; it’s also about style. You can go with a solid color for a clean, simple look. Or, if you’re feeling fancy, you can add decorative flakes for a terrazzo-like finish. Some people even create patterns or use metallic pigments for a really unique floor. The possibilities are pretty much endless. Just remember that lighter colors will show dirt more easily, so keep that in mind if your garage sees a lot of action. Think about how the floor color will complement the rest of your garage setup – your walls, your tools, your car. It’s all about creating a space you actually enjoy being in. Consider epoxy garage floor coatings for a durable and attractive finish.
Industrial vs. Residential Use
This is a big one. What are you really using your garage for? If it’s just parking your car and storing some holiday decorations, a standard residential epoxy kit should be fine. But if you’re running a workshop, fixing cars, or doing anything that involves heavy tools, chemicals, or lots of traffic, you’ll want to step up to an industrial-grade epoxy. Industrial epoxies are designed to withstand more abuse – they’re thicker, more chemical-resistant, and generally longer-lasting. They might cost more upfront, but they’ll save you money in the long run by not needing to be replaced as often.
Think of it this way: residential epoxy is like a regular pair of sneakers, while industrial epoxy is like work boots. Both will protect your feet, but one is built for serious wear and tear. Choose wisely based on your garage’s daily grind.
Here’s a quick comparison:
| Feature | Residential Epoxy | Industrial Epoxy |
|---|---|---|
| Durability | Moderate | High |
| Chemical Resistance | Low | High |
| Cost | Lower | Higher |
| Application | Easier | More complex |
Consider these points when making your decision:
- How often do you use your garage?
- What kind of activities do you do in your garage?
- What’s your budget for the project?
Safety Considerations During Installation
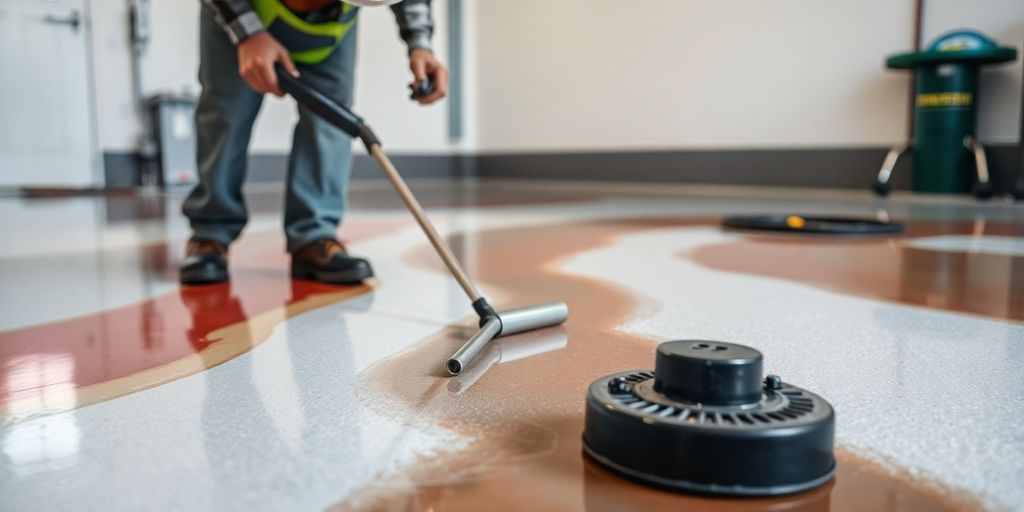
Applying epoxy flooring can seriously upgrade your garage, but it’s super important to do it safely. Epoxy chemicals can be harmful if you don’t take the right precautions. I remember when my neighbor, Dave, tried to install epoxy without any safety gear. Let’s just say it involved a trip to the emergency room and a very expensive cleanup. Don’t be like Dave!
Ventilation Requirements
Proper ventilation is a must when working with epoxy. Epoxy resins and hardeners release fumes that can cause respiratory irritation, headaches, and even dizziness. Open all windows and doors to create cross-ventilation. If natural ventilation isn’t enough, use fans to circulate fresh air. For enclosed spaces, consider using a respirator with an organic vapor cartridge. I usually set up at least two fans, one pulling air in and another pushing it out. It makes a huge difference.
Protective Gear Recommendations
Protecting your skin and eyes is also key. Here’s a list of protective gear I always use:
- Gloves: Wear chemical-resistant gloves, like nitrile or neoprene, to prevent skin contact. Latex gloves won’t cut it – epoxy can seep right through them.
- Eye Protection: Safety glasses or goggles are essential to shield your eyes from splashes and fumes. Trust me, you don’t want epoxy in your eyes.
- Clothing: Wear long sleeves and pants to minimize skin exposure. Consider disposable coveralls for extra protection. Old clothes you don’t mind ruining work too.
- Respirator: As mentioned before, a respirator with an organic vapor cartridge is a good idea, especially in poorly ventilated areas. It’s better to be safe than sorry.
Handling Epoxy Chemicals
Epoxy chemicals need to be handled with care. Always read and follow the manufacturer’s instructions. Here are some general guidelines:
- Mixing: Mix epoxy components in a well-ventilated area. Use the correct mixing ratio specified by the manufacturer. Incorrect ratios can lead to improper curing and a weak floor. I use a drill with a mixing attachment to get everything thoroughly combined.
- Spills: Clean up spills immediately with absorbent materials like paper towels or rags. Dispose of contaminated materials properly. Don’t just let it sit there – epoxy hardens quickly!
- Disposal: Dispose of unused epoxy and empty containers according to local regulations. Don’t pour it down the drain! Check with your local waste management for proper disposal guidelines.
Working with epoxy can be a bit intimidating at first, but taking the necessary safety precautions will make the process much smoother and safer. Always prioritize your health and well-being. A little preparation goes a long way in preventing accidents and ensuring a successful epoxy floor installation.
Comparing Epoxy to Other Flooring Options
Epoxy vs. Paint
Okay, so you’re thinking about sprucing up your garage floor. Paint is cheap, right? But let’s be real, it’s not going to hold up. Epoxy offers way better durability and resistance to chemicals, oil, and all that garage gunk. Paint will chip and peel before you know it, leaving you with a mess. Epoxy creates a much thicker, more resilient layer. It’s an investment, sure, but one that pays off in the long run. Think of it this way:
- Paint: Quick fix, low cost, short lifespan.
- Epoxy: Solid investment, higher cost, long lifespan.
- Bare Concrete: Stains easily, cracks, looks unfinished.
I tried painting my garage floor once. Looked great for about a month. Then the hot tires from my car started peeling it up. What a waste of time and money. Epoxy is the way to go if you want something that lasts.
Epoxy vs. Tiles
Tiles look nice, I’ll give them that. But installing them is a pain, and they can crack or come loose over time. Grout gets dirty, and cleaning it is the worst. Epoxy? Seamless, easy to clean, and super durable. Plus, you can customize the look with colors and flakes. While tiles might offer a specific aesthetic, epoxy flooring gives you a smooth, modern finish that’s hard to beat. Here’s a quick comparison:
| Feature | Epoxy | Tiles |
|---|---|---|
| Installation | Easier, seamless | More complex, grout lines |
| Durability | High, impact-resistant | Can crack, grout susceptible to damage |
| Maintenance | Easy to clean, seamless | Grout cleaning required |
| Customization | Wide range of colors and finishes | Limited by tile selection |
Epoxy vs. Concrete Stains
Concrete stains are a step up from paint, penetrating the concrete for a more permanent color. However, they don’t offer the same level of protection as epoxy. Stains won’t protect against impacts or chemical spills like epoxy will. Epoxy provides a protective layer that’s both beautiful and functional. If you’re just after color and a slightly improved look, stain might work. But for real protection and a professional finish, epoxy is the clear winner. Consider these points:
- Stains offer minimal protection against damage.
- Epoxy creates a durable, protective barrier.
- Epoxy is easier to clean and maintain than stained concrete.
When you think about flooring, epoxy stands out against other options like tile or carpet. It’s tough, easy to clean, and looks great in any space. While tile can crack and carpet can stain, epoxy holds up well under pressure and comes in many colors and styles. If you want a floor that lasts and looks amazing, epoxy is a smart choice. Ready to learn more? Visit our website for details and a free quote!
Wrapping It Up
So, there you have it! Epoxy flooring can really change the game for your garage. It’s tough, looks great, and keeps your concrete safe from wear and tear. Whether you decide to tackle the project yourself or hire someone, just make sure you know what you’re getting into. Take your time with the prep work, and don’t rush the curing process. If you’ve got any more questions or need help, don’t hesitate to reach out to the pros. Happy flooring!
Frequently Asked Questions
What is epoxy flooring?
Epoxy flooring is a special coating that you put on top of concrete floors, like in a garage. It makes the floor stronger and looks nice, too.
How long does epoxy flooring last?
If installed correctly, epoxy flooring can last around 10 to 20 years, depending on how much you use it.
Is epoxy flooring slippery?
Epoxy can be slip-resistant if you choose a special finish. This can help keep you safe when walking on it.
Can I install epoxy flooring myself?
While it’s possible to do it yourself, it can be tricky. It’s best to hire a professional to make sure it’s done right.
What are the benefits of epoxy flooring?
Epoxy flooring is durable, easy to clean, and can resist stains. It also comes in many colors and designs.
How much does it cost to install epoxy flooring?
The cost usually ranges from $2 to $8 per square foot for homes, but it can vary based on the design and color you choose.