Thinking about giving your concrete floor a fresh look? Concrete epoxy floor coating might be just what you need. It’s a really popular choice for lots of spaces, from garages to basements, because it makes floors super tough and good-looking. This guide will walk you through everything you need to know about concrete epoxy floor coating, so you can get a great result.
Key Takeaways
- Concrete epoxy floor coating makes floors strong and look good.
- Proper floor preparation is a must for a good concrete epoxy floor coating.
- There are different kinds of concrete epoxy floor coating, so pick the right one for your needs.
- Applying concrete epoxy floor coating involves a few steps, like mixing and spreading it out.
- You can make your concrete epoxy floor coating unique with colors and textures, and it’s pretty easy to keep clean.
Understanding Concrete Epoxy Floor Coating

What is Concrete Epoxy Floor Coating?
Concrete epoxy floor coating is basically a super tough layer you put on top of your concrete floor. It’s made by mixing two main parts: a resin and a hardener. When these two get together, they create a chemical reaction that makes a rigid, durable, and chemical-resistant surface. Think of it like a shield for your floor, protecting it from all sorts of damage. It’s way more than just paint; it’s a whole system designed to last. You can get it in tons of colors and styles, so it’s not just practical, it can look really cool too. For example, you can use colored resin to customize your floor.
Key Benefits of Concrete Epoxy Floor Coating
Why would you even bother with epoxy? Well, here’s the lowdown:
- Durability: This stuff is tough. It can handle heavy foot traffic, forklifts, and all sorts of abuse without cracking or chipping.
- Chemical Resistance: Spilled oil? No problem. Acid? Bring it on. Epoxy laughs in the face of most chemicals that would ruin other floors.
- Easy to Clean: Just wipe it down. Seriously, it’s that easy. No more scrubbing for hours to get rid of stains.
- Aesthetics: You can make your floor look however you want. Colors, patterns, flakes – the possibilities are endless.
I put epoxy in my garage last year, and it’s been a game-changer. Before, the concrete was always dusty and stained. Now, it looks clean and professional, and I don’t have to worry about oil spills anymore. Plus, it was way easier to install than I thought it would be.
Epoxy Versus Other Floor Coatings
So, how does epoxy stack up against the competition? Let’s take a look:
| Coating Type | Durability | Chemical Resistance | Cost | Aesthetics | Installation Difficulty |
|---|---|---|---|---|---|
| Epoxy | High | High | Moderate | High | Moderate |
| Paint | Low | Low | Low | Moderate | Easy |
| Polyurethane | Moderate | Moderate | Moderate | Moderate | Moderate |
| Concrete Sealer | Low | Low | Low | Low | Easy |
Basically, epoxy gives you the best of both worlds: great protection and a nice look, without breaking the bank. While other options might be cheaper upfront, they won’t last as long or hold up as well under pressure. Think of it as an investment in your floor’s future. Consider the advantages of this long-lasting choice when making your decision.
Essential Preparation for Concrete Epoxy Floor Coating
Getting your concrete ready for epoxy is super important. If you skip steps or do a bad job here, the epoxy coating might not stick right, and you’ll end up with bubbles or peeling. Trust me, you don’t want that!
Evaluating Your Concrete Floor’s Condition
First things first, take a good look at your concrete. You’re checking for any problems that could mess with the epoxy.
- Cracks: Big or small, you gotta find ’em. They need fixing before you even think about epoxy.
- Moisture: Concrete that’s too damp is a no-go. Epoxy won’t stick to it. A simple test is to tape a plastic sheet to the floor for a day. If there’s moisture under it, you’ve got a problem.
- Old Coatings: Is there anything already on the floor? Paint, old epoxy, whatever? It all needs to come off.
Thorough Cleaning and Contaminant Removal
Think of your concrete floor as a giant plate you’re about to serve dinner on – you wouldn’t just slap food on a dirty plate, right? Same goes for epoxy. You need to get rid of all the junk that’s built up over time. Here’s how:
- Sweep: Get rid of all the loose dirt and debris. A good, stiff broom works wonders.
- Scrub: Use a degreaser to scrub away any oil or grease stains. These are epoxy’s worst enemy.
- Rinse: Rinse the floor really well with clean water. You don’t want any soap residue messing things up.
Cleaning is more than just a quick mop. It’s about making sure the epoxy has a clean surface to grab onto. Think of it like this: the better you clean, the better the epoxy will stick, and the longer your floor will last.
Repairing Cracks and Imperfections
Okay, so you’ve found some cracks. Now what? You can’t just ignore them. Here’s the deal:
- Clean the Cracks: Use a brush or vacuum to get any loose stuff out of the cracks.
- Fill ’em Up: Get a good concrete patch and follow the instructions. Usually, you mix it up and trowel it into the cracks.
- Smooth it Out: Once the patch is dry, sand it down so it’s level with the rest of the floor. You want a smooth, even surface for the epoxy to stick to. This is important for concrete garage floors.
Selecting the Ideal Concrete Epoxy Floor Coating System
Types of Epoxy Formulations
Okay, so you’re ready to pick out your epoxy. That’s great! But did you know there are actually different kinds of epoxy? It’s not just one-size-fits-all. You’ve got to think about what you’re using it for. Different formulations offer distinct properties, making some better suited for specific environments than others.
- Water-Based Epoxies: These are low in odor and easy to clean up, making them good for residential use. They’re not as tough as some others, though.
- Solvent-Based Epoxies: These are super durable and chemical-resistant. They’re great for industrial settings, but they smell strong and need good ventilation.
- Solid Epoxies: These are 100% solids, meaning they don’t have any solvents that evaporate. They’re very durable and have low VOCs, but they can be trickier to apply.
Choosing the right type is important. Think about the space, the amount of use it will get, and any specific needs like chemical resistance. Don’t just grab the cheapest one!
Considering Durability and Traffic Needs
How much abuse is your floor going to take? Is it a garage where you’re constantly driving cars and dropping tools? Or is it a basement that mostly sees foot traffic? This makes a huge difference in the type of epoxy you need. For high-traffic areas, you’ll want something that can really stand up to wear and tear. Think about things like impact resistance, abrasion resistance, and chemical resistance. You might even want to consider a polyurea/polyaspartic blend for superior protection.
Here’s a quick guide:
| Traffic Level | Recommended Epoxy Type | Considerations |
|---|---|---|
| Light | Water-Based | Occasional foot traffic, minimal spills. |
| Medium | Solvent-Based | Regular foot traffic, some chemical exposure. |
| Heavy | Solid Epoxies | Constant traffic, heavy machinery, chemical spills. |
Aesthetic Options and Customization
Epoxy isn’t just about function; it can look really cool too! You can get it in all sorts of colors, and there are even ways to add decorative flakes or metallic pigments for a unique look. Want a floor that looks like granite? You can do it! Want a bright, bold color to match your brand? Easy. Don’t be afraid to get creative and contact us to explore different options. It’s a great way to personalize your space and make it look exactly how you want. You can even add non-slip additives for safety, which is especially important in areas that might get wet. The possibilities are pretty much endless!
Step-by-Step Application of Concrete Epoxy Floor Coating
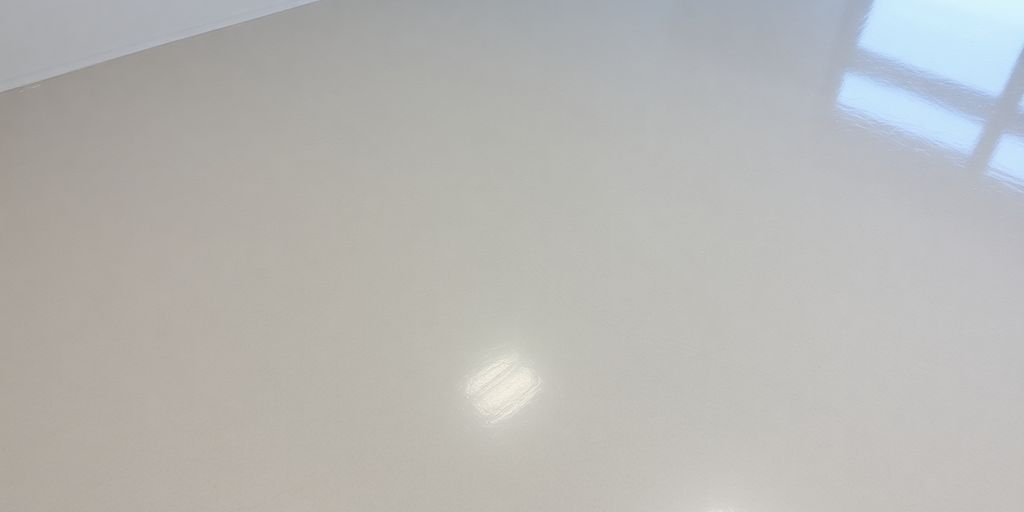
Preparing the Concrete Surface for Adhesion
Okay, so you’re ready to get that epoxy coating down. Awesome! But hold up – you can’t just slap it on and hope for the best. The secret to a floor that looks great and lasts? Prep, prep, and more prep. Think of it like painting – a smooth, clean surface is key.
- First, clean like your life depends on it. Seriously, vacuum, sweep, scrub – the works. Any dust, dirt, or grime will mess with the epoxy’s ability to stick.
- Next, check for any cracks or damage. Fill those in with a concrete patch. Let it dry completely. You don’t want any surprises later.
- Finally, you might need to etch the concrete. This opens up the pores and gives the epoxy something to really grab onto. You can use an etching solution, just follow the instructions carefully and wear protective gear. Rinse well and let it dry. Again, DRY is key.
Proper preparation is the foundation of a successful epoxy coating. By following these steps—evaluating the floor’s condition, cleaning, repairing, etching, and ensuring the surface is dry—you can achieve a durable, attractive finish that will stand the test of time. Taking the time to prepare your concrete floor thoroughly will pay off with a beautiful and long-lasting epoxy coating that enhances the look and functionality of your space.
Mixing and Applying the Epoxy Coating
Alright, the surface is prepped, and you’re ready to mix and pour. This is where things get real. Follow the manufacturer’s instructions to the LETTER. Seriously, don’t eyeball it. The ratios are important for proper curing and strength.
- Mix the epoxy components thoroughly. Use a mixing stick or a drill with a mixing attachment. Make sure you scrape the sides and bottom of the container to get everything incorporated.
- Once mixed, pour the epoxy onto the floor in sections. Use a squeegee or roller to spread it evenly. Work in manageable areas so the epoxy doesn’t start to set up before you can spread it.
- If you’re adding any decorative flakes or pigments, now’s the time to do it. Sprinkle them evenly over the wet epoxy.
Applying Additional Coats and Curing Process
One coat of epoxy is usually not enough. You’ll likely need at least two, maybe even three, depending on the look you’re going for and the type of epoxy you’re using.
- Let the first coat dry completely before applying the next. Check the manufacturer’s instructions for drying times. Don’t rush it!
- Before applying each additional coat, lightly sand the surface to create a better bond. Clean off any dust before applying the next coat.
- Once you’ve applied all the coats, let the epoxy cure completely. This can take several days, depending on the product and the temperature. Don’t walk on it, don’t drive on it, just leave it alone. Patience is key here. Once it’s fully cured, you’ll have a beautiful, durable epoxy floor that will last for years.
Enhancements and Customization for Concrete Epoxy Floor Coating
Incorporating Decorative Flakes and Pigments
Okay, so you’ve decided on epoxy flooring. Great! But did you know you can go way beyond just a plain, solid color? That’s right, it’s time to get creative! One of the easiest ways to spice things up is by adding decorative flakes. These come in all sorts of colors, sizes, and materials. You can get anything from subtle, shimmery metallics to bold, multi-colored blends. The flakes are broadcast into the wet epoxy, and then a clear topcoat seals them in. It’s super durable and looks amazing. Pigments are another cool option. Instead of flakes, you mix a pigment directly into the epoxy resin before you apply it. This gives you a uniform color throughout the entire floor. You can even mix different pigments to create custom shades. Experimenting with flakes and pigments is a fun way to personalize your space and make it truly unique.
Adding Non-Slip Properties for Safety
Let’s talk safety. Epoxy floors are smooth, which can be slippery, especially when wet. Luckily, there are easy ways to add non-slip properties. The most common method is to add a non-slip additive to the final coat of epoxy. These additives are usually made of fine particles, like silica or aluminum oxide, that create a slightly textured surface. You can also use a textured roller to apply the topcoat, which will give you a similar effect. The key is to find the right balance between slip resistance and ease of cleaning. Too much texture, and it’ll be hard to mop. Not enough, and you’re still sliding around. Here’s a quick guide:
- Light Traffic Areas: A light texture additive is usually sufficient.
- High Traffic/Wet Areas: A more aggressive additive or textured roller is recommended.
- Commercial Kitchens/Bathrooms: Consider a combination of both for maximum safety.
It’s important to test a small area first to make sure you’re happy with the level of slip resistance. Also, remember that darker colors tend to show dirt and scuffs more easily, so keep that in mind when choosing your epoxy color.
Achieving Unique Patterns and Designs
Ready to get really wild? Epoxy floors are a blank canvas for all sorts of cool patterns and designs. One popular technique is using stencils. You can buy pre-made stencils or create your own. Simply apply the stencil to the floor, apply the epoxy, and then remove the stencil to reveal the design. Another option is to use different colors of epoxy to create patterns. This requires a bit more skill and planning, but the results can be stunning. For example, you could create a checkerboard pattern, a geometric design, or even a custom logo. Metallic epoxy is also gaining popularity. This type of epoxy contains metallic pigments that create a swirling, three-dimensional effect. It’s perfect for creating a high-end, luxurious look. Don’t forget about epoxy garage floor options, which can transform a dull space into something special. Here are some ideas to get you started:
- Marbling: Create a faux marble effect using different shades of epoxy.
- Swirling: Mix metallic pigments for a dynamic, flowing design.
- Geometric Patterns: Use tape to create clean lines and shapes.
Maintaining Your Concrete Epoxy Floor Coating
Routine Cleaning and Care Practices
Keeping your epoxy floor looking great doesn’t have to be a chore. Regular maintenance is key! The most important thing is to sweep or vacuum regularly to remove loose dirt and debris that can scratch the surface. Think of it like this: those tiny particles are like sandpaper under your feet. Here’s a simple routine:
- Sweep or vacuum at least once a week, maybe more if you have pets or high traffic.
- Mop with a mild soap and water solution. Avoid harsh chemicals or abrasive cleaners.
- Use a microfiber mop for best results. It picks up more dirt and leaves less residue.
Addressing Spills and Stains Promptly
Life happens, and spills are inevitable. The good news is that epoxy is pretty resistant, but you still need to act fast. Don’t let spills sit! Wipe them up as soon as possible to prevent staining or damage. For tougher stains, try these tips:
- For oil or grease, use a degreasing cleaner.
- For water-based spills, blot them up with a clean cloth.
- For stubborn stains, make a paste of baking soda and water, apply it to the stain, let it sit for a few minutes, and then wipe it away. You can also consider using a concrete degreaser for tough stains.
Promptly addressing spills and stains is crucial for maintaining the appearance and longevity of your epoxy floor. Ignoring spills can lead to discoloration or even damage to the coating over time.
Long-Term Preservation of Your Epoxy Floor
With the right care, your epoxy floor can last for years. Here are some tips for long-term preservation:
- Use mats at entrances to trap dirt and debris before they get onto the floor.
- Avoid dragging heavy objects across the floor. Use furniture pads to protect the surface.
- Consider applying a wax or polish specifically designed for epoxy floors to add an extra layer of protection. This can help maintain the shine and prevent scratches. You might also consider applying additional epoxy coatings for added protection.
| Maintenance Task | Frequency | Products to Use |
|---|---|---|
| Sweeping/Vacuuming | Weekly | Broom, vacuum with soft brush attachment |
| Mopping | Bi-Weekly | Mild soap, water, microfiber mop |
| Spill Cleanup | Immediately | Clean cloth, appropriate cleaner for the spill |
| Waxing/Polishing (Opt.) | Annually | Epoxy-specific wax or polish |
Professional Versus DIY Concrete Epoxy Floor Coating Installation
Assessing Project Complexity for DIY
So, you’re thinking about doing your own epoxy floor? That’s cool! But first, let’s be real about what’s involved. Some projects are totally doable for a weekend warrior, while others… not so much. Think about the size of the area. A small garage? Maybe. A huge warehouse? Probably not a great idea. Also, how’s your concrete? Is it smooth and even, or cracked and uneven? The worse the condition, the more prep work you’re looking at. And prep work is KEY.
- Small area vs. Large area
- Condition of the concrete
- Your skill level
Benefits of Professional Epoxy Installation
Okay, let’s talk about why you might want to call in the pros. Professionals bring experience and the right tools to the table. They know how to handle tricky situations, like moisture issues or uneven surfaces. Plus, they can usually get the job done faster and with a higher-quality finish. Sure, it’ll cost more upfront, but it could save you money in the long run by avoiding costly mistakes. They also know about industrial epoxy floor coating and can help you choose the right one.
- Experience and expertise
- Proper tools and equipment
- Warranty and guarantee
DIY can be tempting to save some money, but sometimes it’s better to invest in a professional. It’s like cutting your own hair – it might seem like a good idea at the time, but you might regret it later.
When to Enlist Experienced Installers
So, when should you definitely call in the pros? If you’re dealing with a large area, seriously damaged concrete, or if you want a super fancy finish (like metallic or decorative flakes), it’s probably best to leave it to the experts. Also, if you’re not comfortable working with chemicals or power tools, don’t risk it. It’s better to be safe than sorry. Plus, professionals can advise on installing and maintaining your epoxy concrete floors for the long haul.
| Factor | DIY Feasible? | Professional Recommended? |
|---|---|---|
| Project Size | Small | Large |
| Concrete Condition | Good | Poor |
| Desired Finish | Basic | Complex |
Deciding between doing it yourself or hiring pros for your concrete epoxy floor can be tough. While DIY might save you money upfront, getting a perfect, long-lasting finish often needs special tools and know-how. For a floor that looks great and lasts for years, it’s usually best to let the experts handle it. Want to see how we can make your floors shine? Check out our website for a free quote!
Conclusion
So, putting down an epoxy floor is a pretty smart move. It can really make any room look better, work better, and even add some value to your place. If you just follow the steps we talked about here, and pick out the right stuff, you’ll end up with a floor that looks amazing and lasts a super long time. You can finally ditch those old, boring floors and say hello to the cool, tough world of epoxy.
Frequently Asked Questions
What exactly is concrete epoxy floor coating?
Epoxy floor coating is like a tough, protective skin for your concrete floor. It’s made from a special kind of plastic material that, when mixed with a hardener, creates a super strong and shiny surface. Think of it as a durable shield that makes your floor look great and last a long time.
Why should I choose epoxy for my concrete floor?
Epoxy floors are awesome because they’re super tough, easy to clean, and can handle spills and heavy stuff without getting damaged. They also look really nice, making any space, like a garage or basement, much more appealing. Plus, they can make your floor last much longer.
How do I get my concrete floor ready for epoxy?
Getting your floor ready is the most important part! You need to make sure the concrete is clean, dry, and smooth. This means cleaning up any dirt or grease, fixing cracks, and sometimes even grinding the surface a little. If the floor isn’t ready, the epoxy might not stick well.
How do I pick the right epoxy for my home?
It depends on what you need! There are different types of epoxy for different jobs. Some are super strong for places with lots of traffic, while others are better for looks. You can also pick different colors and even add flakes for a cool design.
What’s the process for putting on the epoxy coating?
After you mix the epoxy, you spread it evenly over the clean floor using a roller. You might need to put on a few coats. The most important thing is to let each coat dry completely, which is called ‘curing,’ before you use the floor. This makes sure it gets super hard and durable.
How do I take care of my new epoxy floor?
Keeping your epoxy floor looking good is easy! Just clean it regularly with mild soap and water. Try to wipe up spills quickly so they don’t sit on the floor. If you take good care of it, your epoxy floor will stay shiny and strong for many, many years.